Window1.xaml.cs
using System.Windows;
using System.Windows.Media;
using System.Windows.Media.Imaging;
namespace ImageEditing
{
public partial class Window1 : Window
{
public Window1()
{
InitializeComponent();
int width = 300;
int height = 300;
// Create a writeable bitmap (which is a valid WPF Image Source
WriteableBitmap bitmap = new WriteableBitmap(width, height, 96, 96, PixelFormats.Bgra32, null);
// Create an array of pixels to contain pixel color values
uint[] pixels = new uint[width * height];
int red;
int green;
int blue;
int alpha;
for (int x = 0; x < width; ++x)
{
for (int y = 0; y < height; ++y)
{
int i = width * y + x;
red = 0;
green = 255 * y / height;
blue = 255 * (width - x) / width;
alpha = 255;
pixels[i] = (uint)((blue << 24) + (green << 16) + (red << 8) + alpha);
}
}
// apply pixels to bitmap
bitmap.WritePixels(new Int32Rect(0, 0, 300, 300), pixels, width * 4, 0);
// set image source to the new bitmap
this.MainImage.Source = bitmap;
}
}
}
Window1.xaml
<Window x:Class="ImageEditing.Window1"
xmlns="http://schemas.microsoft.com/winfx/2006/xaml/presentation"
xmlns:x="http://schemas.microsoft.com/winfx/2006/xaml"
Title="Window1" Height="300" Width="300">
<Grid>
<Image x:Name="MainImage"/>
</Grid>
</Window>
xmlns="http://schemas.microsoft.com/winfx/2006/xaml/presentation"
xmlns:x="http://schemas.microsoft.com/winfx/2006/xaml"
Title="Window1" Height="300" Width="300">
<Grid>
<Image x:Name="MainImage"/>
</Grid>
</Window>
And the result...
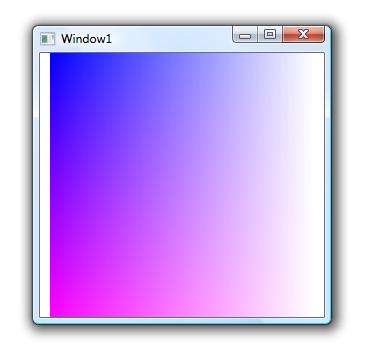
As a side note, you don't need to modify all the pixels simultaneously. If you want to modify a smaller region, you can pass in a smaller array of uints to the WritePixels method. The stride parameter for WritePixels is the number of BYTES across your array is PER ROW. As long as the pixel array you passed in has a length that is divisible by the stride divided by 4 and is in sync with the Int32Rect you passed in as the first parameter, you can modify any rectangular region as you wish to optimize your edits.
So there you have it: The sample code for doing basic image manipulation in C#, .NET, WPF, whatever. This really opens up doors for you. For example, based on mouse down/up/move events, you could easily make an mspaint clone. Or your own photo optimizing program based on RGB number crunching. Or just simple scripts such as converting a white-black image into a transparent-black image. Or perhaps you can make your own grand 2D Graphics library for WPF that you sell for lots of money. But those all sound like really good NP posts, so stay tuned.